Table of Contents
ToggleSimpliSafe has carved out a reputation as one of the most DIY-friendly security systems on the market, and their cameras are no exception. For homeowners looking to add video monitoring without running wires or hiring installers, SimpliSafe cameras offer plug-and-play simplicity with professional-grade features. Whether you’re monitoring a front porch, keeping an eye on deliveries, or checking in on pets while you’re out, these cameras integrate seamlessly with the broader SimpliSafe ecosystem. This guide walks through what sets SimpliSafe cameras apart, how to choose between indoor and outdoor models, and what you need to know about installation, storage, and monitoring plans.
Key Takeaways
- SimpliSafe cameras offer DIY-friendly installation with Wi-Fi connectivity and AI-powered person detection that significantly reduces false alarms from environmental motion.
- Both indoor and outdoor SimpliSafe camera models record at 1080p HD with night vision, battery backup, and privacy mode—allowing homeowners full control without professional installation.
- Cloud storage and motion alerts require a subscription ($19.99–$29.99/month), with the Standard plan offering 30 days of unlimited recording, a generous retention period compared to competitors.
- SimpliSafe outdoor cameras are weatherproof (IP65 rated) with 3–6 month battery life and optional solar charging, making them ideal for porches, driveways, and side yards.
- Integration with a SimpliSafe alarm system enables automatic recording when sensors trip, timeline synchronization of events, and arm/disarm automation for seamless whole-home security.
What Makes SimpliSafe Cameras Stand Out for Homeowners
SimpliSafe cameras are built for the homeowner who wants effective security without a steep learning curve or monthly contracts that lock you in for years. Unlike many competitors that require professional installation or proprietary hubs, SimpliSafe cameras connect directly to your Wi-Fi network and sync with the SimpliSafe app in minutes.
One standout feature is AI-driven person detection. Instead of triggering alerts every time a tree branch sways, the camera uses machine learning to distinguish between people, animals, and motion caused by environmental changes. This cuts down on false alarms significantly. SimpliSafe’s outdoor monitoring service has been tested in real-world conditions and shows promising accuracy in identifying actual threats versus routine activity.
Another practical advantage is battery backup. Power outages won’t leave your cameras blind, SimpliSafe outdoor models include rechargeable batteries that keep recording even when the grid goes down. Indoor models plug into standard outlets but can also run on backup power if paired with the SimpliSafe base station.
Privacy is handled locally when possible. The cameras allow privacy mode, which physically shuts off the lens and microphone when you’re home, useful for families who want security when away but don’t want a camera running 24/7 in shared spaces. This is a feature that appeals to DIYers who value control over their data without needing to dig through settings menus.
SimpliSafe Camera Models: Indoor vs Outdoor Options
SimpliSafe Indoor Camera Features and Best Use Cases
The SimpliSafe Indoor Camera is a compact, wall- or shelf-mountable unit designed for interior monitoring. It shoots 1080p HD video with a 120-degree field of view, which covers most standard rooms without fish-eye distortion. The camera includes two-way audio, so you can talk to kids, pets, or delivery personnel through the app.
It features motion-activated recording, meaning it won’t waste storage on empty rooms. You can set activity zones to ignore high-traffic areas like hallways or windows with street views, focusing alerts on entry points or specific furniture. Night vision uses infrared LEDs effective up to 15 feet, suitable for most bedrooms, living rooms, or hallways.
Best use cases include monitoring entryways, nurseries, or home offices. The camera mounts via a magnetic base or adhesive strip, no drilling required unless you want a permanent install. The included USB power cable is 10 feet long, so plan outlet placement accordingly. If you’re mounting higher than waist level, consider using a right-angle USB adapter to keep the cable flush against the wall.
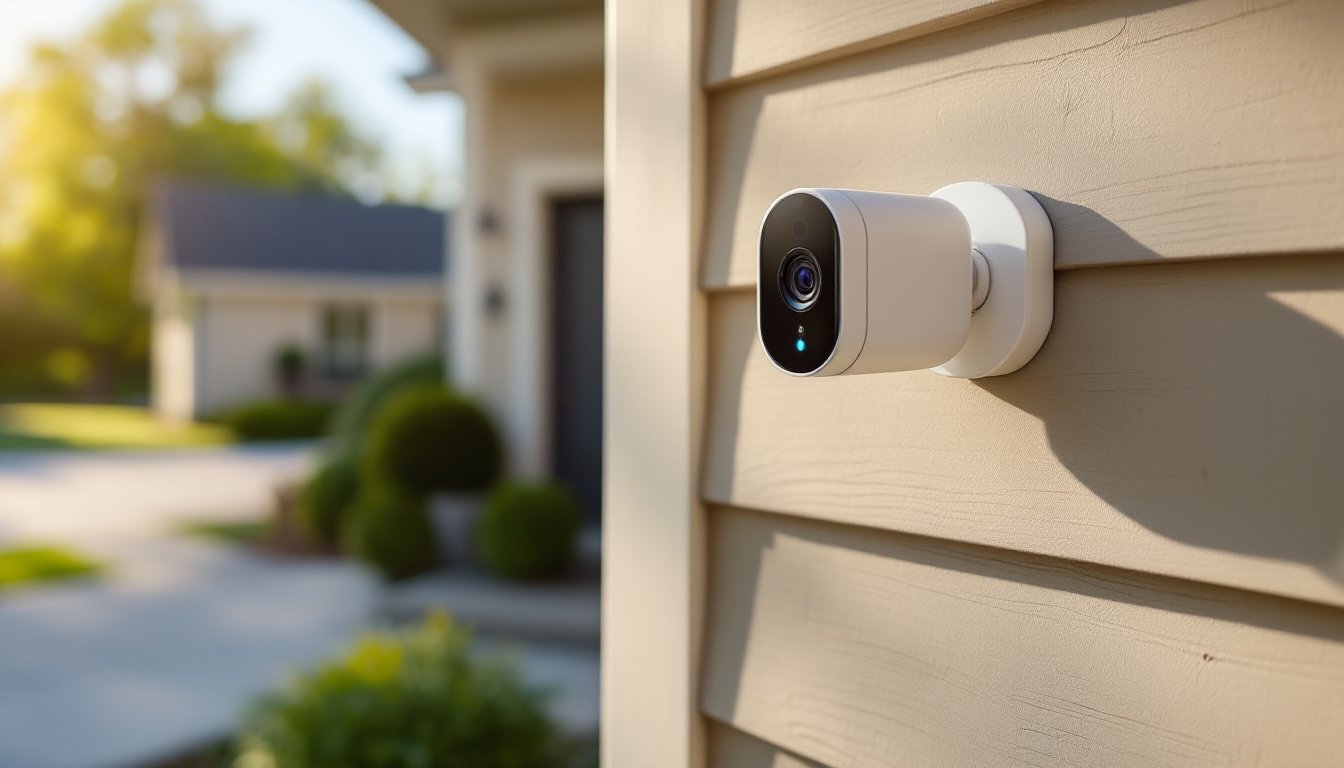
SimpliSafe Outdoor Camera: Weatherproof Protection
The SimpliSafe outdoor security camera is built to handle the elements. It carries an IP65 weatherproof rating, meaning it’s dust-tight and can withstand water jets from any direction, rain, snow, and hose spray won’t faze it. Operating temperature range is -4°F to 122°F, which covers most U.S. climates, though extreme cold in northern regions may reduce battery life slightly.
This model also records in 1080p HD with a 140-degree field of view, wider than the indoor version to cover driveways, porches, or side yards. It includes color night vision when ambient light is present (like porch lights or streetlamps), switching to infrared in complete darkness with a range of 30 feet.
The outdoor camera runs on a rechargeable battery rated for 3-6 months depending on activity levels. Heavy motion zones (busy sidewalks, active driveways) will drain faster. SimpliSafe sells a solar panel accessory that trickle-charges the battery, worth considering if your install location gets 4+ hours of direct sun daily. The camera can also be hardwired using a weatherproof micro-USB cable (sold separately), which eliminates recharging but requires access to an outdoor outlet or low-voltage transformer.
Installation spots should be 7-10 feet off the ground to balance coverage and deterrence. Mounting hardware includes wood screws and masonry anchors. If installing on vinyl siding, use a siding mounting block to create a flat surface and prevent water intrusion behind the siding. Always drill pilot holes to avoid splitting wood trim or cracking masonry.
Installation and Setup: DIY Installation Made Simple
SimpliSafe cameras are designed for homeowners to install without professional help, and the process lives up to that promise. Here’s the step-by-step for both models.
Indoor Camera Installation:
- Choose your location. Corners provide the widest coverage. Avoid pointing cameras directly at windows, backlighting and glare will wash out the image.
- Mount the base. Use the adhesive strip for drywall or the magnetic mount for metal surfaces like filing cabinets. For permanent installs, use the included screws and wall anchors (toggle bolts for drywall, plastic anchors for studs).
- Plug in the camera. Route the USB cable along baseboards or behind furniture. Use cable clips or cord channels for a clean look.
- Download the SimpliSafe app (iOS or Android) and create an account if you don’t have one.
- Add the camera via the app’s “Add Device” menu. Scan the QR code on the camera base, enter your Wi-Fi password, and wait for the connection to confirm (usually under 30 seconds).
- Adjust settings: activity zones, motion sensitivity, and privacy mode preferences.
Outdoor Camera Installation:
- Test the Wi-Fi signal at your planned install location before drilling. Open the SimpliSafe app’s camera setup and check signal strength, you need at least two bars for reliable streaming. If signal is weak, consider a Wi-Fi extender rated for outdoor use.
- Charge the battery fully before installation (takes about 5 hours via USB).
- Mark mounting holes. Hold the mounting bracket against the surface, level it, and mark screw locations with a pencil.
- Drill pilot holes. For wood siding or trim, use a 3/32-inch bit. For brick or concrete, use a 5/32-inch masonry bit and insert the included plastic anchors.
- Attach the bracket with screws. Tighten until snug, overtightening can strip wood or crack masonry.
- Snap the camera onto the bracket. The magnetic mount holds firmly but allows angle adjustments.
- Activate in the app the same way as the indoor model. Aim the camera, then lock the angle by tightening the ball-joint screw on the mount.
Safety note: If you’re mounting above 10 feet or on a ladder taller than 6 feet, have a second person spot you. Always use a ladder rated for your weight plus tools, and set it on level ground. Wear safety glasses when drilling overhead to avoid dust and debris in your eyes.
Video Quality, Storage, and Monitoring Plans
SimpliSafe cameras record at 1080p resolution (1920×1080 pixels), which is sharp enough to identify faces within 20 feet and read license plates within 10-15 feet under good lighting. Frame rate is 15 fps, which is lower than some competitors (30 fps is standard for premium models) but adequate for monitoring, you won’t get perfectly smooth motion, but you’ll catch every important event.
Storage options depend on your subscription tier:
- No subscription (free tier): Live streaming only. No cloud storage, no timeline scrubbing, and no motion alerts. You can open the app and watch in real time, but nothing is saved.
- Standard Monitoring Plan ($19.99/month): Unlimited camera recording with 30 days of cloud storage. Motion and person alerts, timeline playback, and downloadable clips. This tier also includes professional monitoring for the SimpliSafe alarm system if you have one.
- Fast Protect Plan ($29.99/month): Everything in Standard, plus live guard protection, human agents monitor camera alerts and can dispatch police if they see suspicious activity. This is SimpliSafe’s premium tier and includes cellular backup for the base station.
There’s no local storage option (no SD card slot), so if you want recordings, a subscription is required. That’s a downside for budget-conscious DIYers, though the 30-day cloud retention is generous compared to competitors that cap at 7-10 days.
Professional monitoring options have been reviewed favorably for response times and ease of use, particularly when integrated with the full SimpliSafe alarm system. Video quality holds up well in tests, though low-light performance on the indoor model can show some grain compared to outdoor cameras with color night vision.
Integration with Your SimpliSafe Security System
SimpliSafe cameras work as standalone devices, but they really shine when paired with a SimpliSafe alarm system. Integration is automatic once both are linked to the same account, no extra configuration needed.
Key integration features:
- Alarm-triggered recording: When a door/window sensor or motion detector trips the alarm, cameras automatically start recording, even if they didn’t detect motion themselves. This fills in coverage gaps.
- Timeline sync: The app’s timeline shows camera footage alongside alarm events (door opens, motion detected, alarm triggered) in a single chronological view. Makes it easy to piece together what happened during an incident.
- Arm/disarm automation: Set cameras to privacy mode when the system is disarmed (you’re home) and automatically enable recording when you arm the system (leaving or going to bed).
- Smart lock integration: If you have a SimpliSafe smart lock, the camera can trigger recording when the lock is operated, capturing who comes and goes.
SimpleSafe systems also integrate with Alexa and Google Assistant for voice control, “Alexa, show me the front door camera”, though you’ll need an Echo Show, Fire TV, or Google Nest Hub with a screen for video. Apple HomeKit is not supported as of 2026, which is a limitation for households deep in the Apple ecosystem.
For homes without a SimpliSafe alarm system, the cameras still function well on their own, but you’re missing out on the alarm-camera coordination that makes the ecosystem effective. If you’re planning to build out a full security setup over time, starting with a camera and base station is a solid foundation.