Table of Contents
ToggleSubway tile has anchored kitchen design for more than a century, and it’s not stepping aside anytime soon. Walk into a flip, a farmhouse renovation, or a high-end condo kitchen, and there’s a good chance you’ll see those familiar 3×6-inch rectangles climbing the wall. The appeal isn’t just nostalgia, subway tile backsplash kitchen installations offer durability, affordability, and a clean backdrop that works with nearly any cabinet style or countertop material. Whether someone’s planning a white subway tile kitchen backsplash for a classic look or exploring bold grout lines and stacked layouts, this guide walks through material choices, layout options, installation steps, and cost planning to help homeowners get it right the first time.
Key Takeaways
- A subway tile kitchen backsplash combines durability, affordability ($0.50–$3.00 per square foot for basic ceramic), and versatile design, making it the timeless choice for kitchens.
- Material choice significantly impacts performance: porcelain resists stains and water better than ceramic, while glass and natural stone offer premium aesthetics at higher price points.
- Layout patterns—running bond, stacked, herringbone, and vertical—transform the backsplash character; running bond is most forgiving for DIY installers, while herringbone requires advanced skills and higher waste.
- Proper installation hinges on adequate thinset coverage (at least 80%), correct mixing consistency, and patience during curing; a wet saw rental is essential for clean cuts.
- Grout color strategy is as important as tile selection: white grout creates a seamless look, dark grout adds modern contrast, and grout type (sanded, unsanded, or epoxy) depends on joint width and durability needs.
- A typical 30-square-foot DIY subway tile kitchen backsplash costs $200–$900 for materials and tool rental, while professional installation adds $300–$750 in labor but ensures precision around outlets and windows.
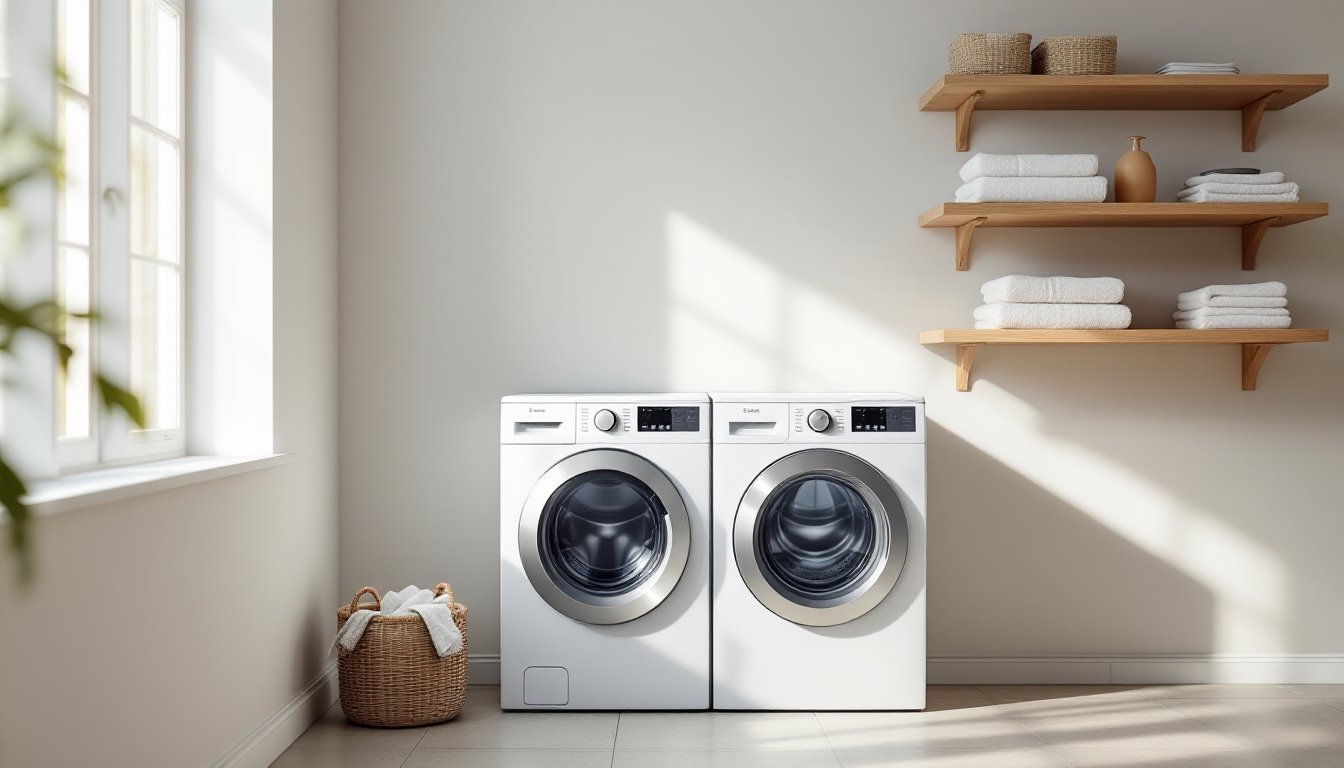
Why Subway Tile Remains the Most Popular Backsplash Choice
Subway tile earned its name in early 1900s New York City subway stations, where designers needed something durable, easy to clean, and bright enough to reflect limited lighting. Those same qualities translate directly to residential kitchens.
The standard 3×6-inch ceramic tile is widely available, typically running $0.50 to $3.00 per square foot for basic white glazed versions. That price point makes it accessible for DIYers working within tight budgets. Beyond cost, subway tile plays well with other materials, it won’t compete with a bold quartz countertop or intricate cabinet hardware. It recedes when it should and anchors a design when the rest of the kitchen stays neutral.
Durability matters in a high-splash zone. Glazed ceramic and porcelain subway tiles resist staining, heat, and moisture better than painted drywall or peel-and-stick alternatives. Grout lines do require periodic sealing (typically every 12-18 months), but the tile surface itself can handle decades of use without fading or cracking, assuming proper installation.
Another advantage: subway tile’s rectangular shape suits walls better than square mosaics. The 3×6 format aligns with standard stud spacing (16 inches on center) and typical cabinet heights, reducing the number of cuts needed during installation. For a homeowner tackling their first backsplash project, fewer cuts mean fewer chances for mistakes.
Choosing the Right Subway Tile for Your Kitchen
Not all subway tiles come from the same mold. Material, finish, and size variations can shift the look and performance significantly.
Material and Finish Options
Ceramic remains the workhorse. It’s kiln-fired clay with a glazed surface, available in gloss, matte, or textured finishes. Gloss reflects light and makes small kitchens feel larger, but it also shows water spots and fingerprints. Matte finishes hide smudges better and lend a softer, more contemporary feel.
Porcelain is denser than ceramic, fired at higher temperatures, which makes it less porous and more stain-resistant. It costs about 20-30% more than standard ceramic but holds up better in heavy-use kitchens. For a white subway tile backsplash kitchen install near a range or sink, porcelain’s lower water absorption rate (less than 0.5%) is worth the upcharge.
Glass subway tile brings translucency and depth. Light passes through the tile and bounces off the thinset, creating a glow that ceramic can’t match. Glass tiles typically run $8 to $15 per square foot and require a white thinset (gray will show through). They’re harder to cut, score-and-snap methods don’t work, so a wet saw with a glass blade is necessary.
Natural stone options, like marble or travertine, offer a kitchen backsplash subway tile aesthetic with organic variation. Each piece differs slightly in color and veining. Stone is porous and requires sealing before grouting and again annually. It’s also softer: acidic cleaners (vinegar, citrus) can etch the surface.
Size matters, too. While 3×6 inches is classic, 2×4-inch and 4×8-inch formats are gaining traction. Smaller tiles increase grout line density, which some homeowners love for the grid effect, but more grout means more maintenance. Larger formats reduce grout coverage and speed up installation, though they can feel less traditional.
Beveled edges add subtle dimension. The angled profile catches light and creates shadow lines between tiles. Flat-edge (also called pressed-edge) tiles sit flush, delivering a more modern, seamless look. Beveled tiles cost slightly more and can trap grease in the groove, so factor in cleaning effort.
Layout Patterns That Transform Your Backsplash
How the tiles go up matters as much as which tiles get chosen. Layout shifts the entire character of a kitchen subway tile backsplash.
Running bond (also called offset or brick bond) is the classic pattern: each tile centers over the joint below, creating a 50% offset. It’s forgiving for beginners because slight inconsistencies blend in. Start with a level line, and the rest tends to fall into place.
Stacked (or grid) layout aligns all joints vertically and horizontally, forming a graph-paper grid. This pattern feels crisp and modern but shows every imperfection. If the wall isn’t perfectly plumb or tile sizes vary even slightly, the lines won’t read straight. It’s a better choice for experienced installers or for tiles with very tight dimensional tolerances (porcelain typically has less size variation than handmade ceramic).
Herringbone rotates the tiles 45 degrees, creating a zigzag pattern. It’s striking and adds visual interest across design platforms like Houzz, but it’s also the most labor-intensive layout. Every tile requires two angled cuts, and waste runs higher, budget an extra 15-20% for cuts and mistakes. A wet saw is non-negotiable.
Vertical stack runs tiles in columns, with the long edge vertical instead of horizontal. This draws the eye up, making low ceilings feel taller. It’s less common, which gives it a contemporary edge, but it can look busy if the kitchen already has strong vertical elements (tall cabinets, narrow windows).
Diagonal installations tilt the entire field at a 45-degree angle. This works better with square tiles than rectangles, but some designers use it to add movement to a white subway tile kitchen backsplash that might otherwise feel static.
DIY Installation: Step-by-Step Process
Installing a kitchen backsplash subway tile is a solid weekend project for a DIYer comfortable with measuring and working methodically. Structural work isn’t involved, and no permits are required in most jurisdictions.
Materials and tools:
- Subway tiles (calculate square footage of wall area, then add 10% for cuts and waste)
- Thinset mortar (modified for drywall, unmodified for cement backer board)
- Grout (sanded for joints wider than 1/8 inch, unsanded for tighter spacing)
- Tile spacers (1/16-inch or 1/8-inch, depending on desired grout line width)
- Notched trowel (1/4×1/4-inch square notch for wall tile)
- Wet saw or tile cutter
- Grout float
- Sponges and buckets
- Level (4-foot recommended)
- Painter’s tape and drop cloths
- Safety glasses, dust mask, and gloves
Step 1: Prep the wall. Remove outlet covers and switch plates. Clean the wall to remove grease and dust, thinset won’t bond to grime. If the drywall is painted with glossy paint, lightly sand it or apply a bonding primer to improve adhesion. Check the wall for plumb with a level. Minor deviations are fine: thinset can fill small gaps.
Step 2: Plan the layout. Measure the backsplash area and dry-fit a row of tiles to see where cuts will land. Avoid ending with slivers narrower than half a tile, they look unfinished and are difficult to cut. Adjust the starting point left or right to balance the layout. Mark a level line at the bottom edge where the first row will sit. If the countertop isn’t level (common in older homes), decide whether to follow the counter or follow level. Following level looks better but may leave a gap that needs caulking.
Step 3: Mix and apply thinset. Mix thinset to a peanut butter consistency, thick enough to hold ridges but not so stiff it’s hard to spread. Apply it to the wall in small sections (about 3×3 feet) using the flat side of the trowel, then comb through with the notched side at a 45-degree angle. The ridges help the tile grab and allow air to escape.
Step 4: Set the tiles. Press each tile into the thinset with a slight twist. Insert spacers at each corner to maintain consistent grout lines. Work in small sections, checking level and alignment frequently. For cuts around outlets, measure twice and use a wet saw for clean edges. Nippers work for small notches, but a wet saw is worth renting for any project larger than a small section.
Step 5: Let it cure. Allow thinset to cure for at least 24 hours before grouting. Check the thinset packaging, some formulations require 48 hours, especially in humid or cold conditions.
Step 6: Grout the joints. Remove spacers. Mix grout and work it into the joints with a grout float, holding the float at a 45-degree angle and moving diagonally across the tiles to pack the joints fully. Wipe away excess with a damp (not wet) sponge, rinsing frequently. Let the grout haze dry for 15-20 minutes, then buff with a clean, dry cloth.
Step 7: Seal and finish. After grout cures (typically 72 hours), apply a penetrating grout sealer to protect against staining. Reattach outlet covers and run a bead of caulk along the bottom edge where tile meets countertop, grout is rigid and will crack with movement, but caulk flexes.
One common mistake: skimping on thinset coverage. Tiles should have at least 80% coverage on the back: too little thinset creates voids where tiles can crack under impact. Periodically pull a tile back up during installation to check coverage.
Grout Selection and Color Strategies
Grout does more than fill gaps, it defines the tile grid and sets the entire tone of the backsplash. A white subway tile backsplash kitchen can look traditional, modern, or industrial depending solely on grout choice.
White or light gray grout blends with white tile, creating a seamless, monolithic surface. This is the safest choice and the one most buyers expect if resale is a consideration. Light grout does show staining over time, especially near the stove, but periodic cleaning with a grout brush and pH-neutral cleaner keeps it fresh. For extra protection, use an epoxy grout or add a grout sealer.
Dark grout (charcoal, black, or navy) creates bold contrast and highlights the grid. It’s a modern look that hides stains and reduces visible maintenance. Dark grout can make a small kitchen feel busier, though, so it works best in kitchens with ample natural light or larger backsplash areas. Design inspiration on platforms like Remodelista often features this high-contrast pairing.
Matching grout to the tile color, gray tile with gray grout, for example, delivers a subtle, cohesive look. It downplays the grid and lets other elements (cabinets, hardware, countertops) take focus.
Sanded vs. unsanded: Use sanded grout for joints 1/8 inch or wider. The sand adds strength and prevents shrinkage. For joints narrower than 1/8 inch, use unsanded grout, sand particles can scratch tile surfaces in tight spaces, especially on glass or polished stone.
Epoxy grout is stain-proof, doesn’t require sealing, and resists moisture better than cement-based grout. It costs about three times as much and is trickier to work with (it sets fast and is harder to clean off tile surfaces), but it’s ideal for high-use areas or for homeowners who want a set-it-and-forget-it solution.
Grout joint width also plays a role. 1/16-inch joints create a tight, almost seamless look but require tiles with very consistent dimensions. 1/8-inch joints are more forgiving and still look clean. Anything wider than 1/4 inch starts to dominate visually and collects more grime.
Cost Breakdown and Budget Planning
A typical subway tile backsplash covering 30 square feet (a standard 10-foot run of countertop with 18 inches of height) runs between $200 and $900 for a DIY installation, depending on tile choice and whether tools need to be purchased or rented.
Tile costs range widely:
- Basic white ceramic subway tile: $0.50–$3.00 per square foot
- Mid-grade porcelain or textured ceramic: $3.00–$8.00 per square foot
- Glass or stone subway tile: $8.00–$20.00+ per square foot
For a 30-square-foot backsplash, tile alone runs $15 to $600.
Thinset and grout add another $20 to $50. A 50-pound bag of thinset costs about $15 and covers roughly 100 square feet at the recommended thickness. Grout costs $10 to $30 per bag, depending on type.
Tools and supplies can add $100 to $300 if starting from scratch. A wet saw rental runs $50 to $75 per day (purchase price is $100–$300 for a basic model). Trowels, spacers, floats, and sponges add another $30 to $50. If these tools will see future use, buying makes sense: otherwise, rent.
Professional installation costs $10 to $25 per square foot for labor, so that same 30-square-foot backsplash would run $300 to $750 in labor alone, plus materials. Pros work faster and handle tricky cuts around outlets or windows more cleanly, but the project is absolutely manageable for a motivated DIYer.
Budget planning tips:
- Buy 10% extra tile to cover cuts, breakage, and future repairs. Tile batches can vary slightly in shade, and discontinued patterns make exact matches hard to find later.
- Compare per-square-foot pricing across suppliers. Big-box stores stock affordable basics, but specialty tile shops and online retailers often carry unique finishes at competitive prices.
- Don’t cheap out on thinset or grout. A $5 difference in product cost is negligible compared to the time invested, and premium thinset bonds better while quality grout resists staining longer.
- If renting a wet saw, plan to complete all cuts in one day to avoid multi-day rental fees.
For small kitchen projects or accent areas, some homeowners explore creative ideas featured on sites like The Kitchn to maximize visual impact without covering every inch of wall space. A partial backsplash behind the range or sink area can cut material costs by 40-60% while still delivering the subway tile look where it matters most.
Regional pricing varies. Urban markets and coastal areas typically see higher material and labor costs, while rural and suburban Midwest locations often run 20-30% lower. Tile availability also fluctuates, certain imported or artisan tiles may have lead times of several weeks, so order early if choosing specialty materials.